

For us, date nights at home started out as a more economical way to celebrate life’s special occasions, but they’ve since become one of our most favorite traditions. There’s no wait in line, no rush to finish your meal, no reason to be uncomfortably dressed up and every reason to be 100 percent yourself. I find we laugh more, linger at the table longer and spend more time savoring the meal we made together.
But the key to a successful date night “in” is finding recipes that allow you to step out of your weeknight rotation. Something that feels extra special or fun and can be made together. In college, my roommate decided that for Valentine’s Day she wanted to make Julia Child’s Beef Bourguignon. It was an all day affair that ended with all of us gathered around the table sharing a bottle of wine we couldn't really afford. It was one of the most delicious meals I’ve ever had and easily one of my favorite memories to this day.
All that to say, date night “in” is just as fun with friends or roommates as it is with a significant other. If you have others joining you, have someone bring a nice bouquet of flowers or their favorite record. Set the table and get out your favorite glassware and consider investing in that bottle of wine you’ve been eyeing all year. It’s these few subtle touches that transform your space just enough to make it feel special.


Now let’s talk about the menu. One of my favorite things to make for date night is homemade pasta. I find it’s 1.) simple to throw together and incredibly fun to make, 2.) the more hands the better and 3.) it can accommodate a number of diets and flavor preferences.
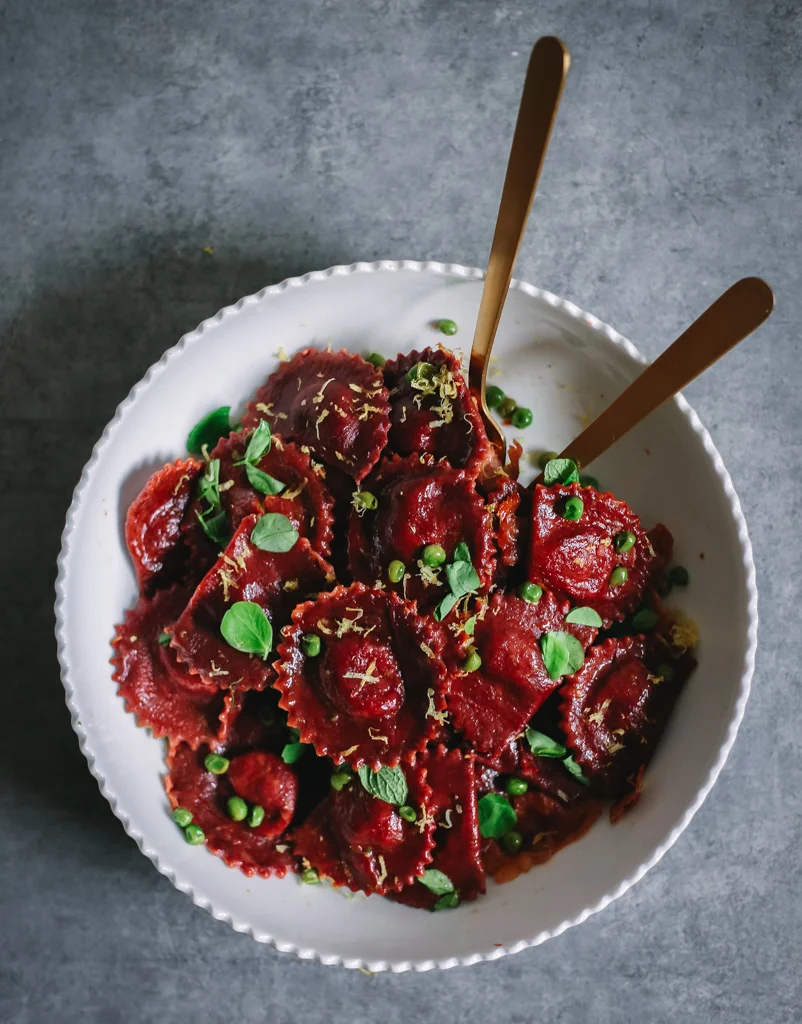
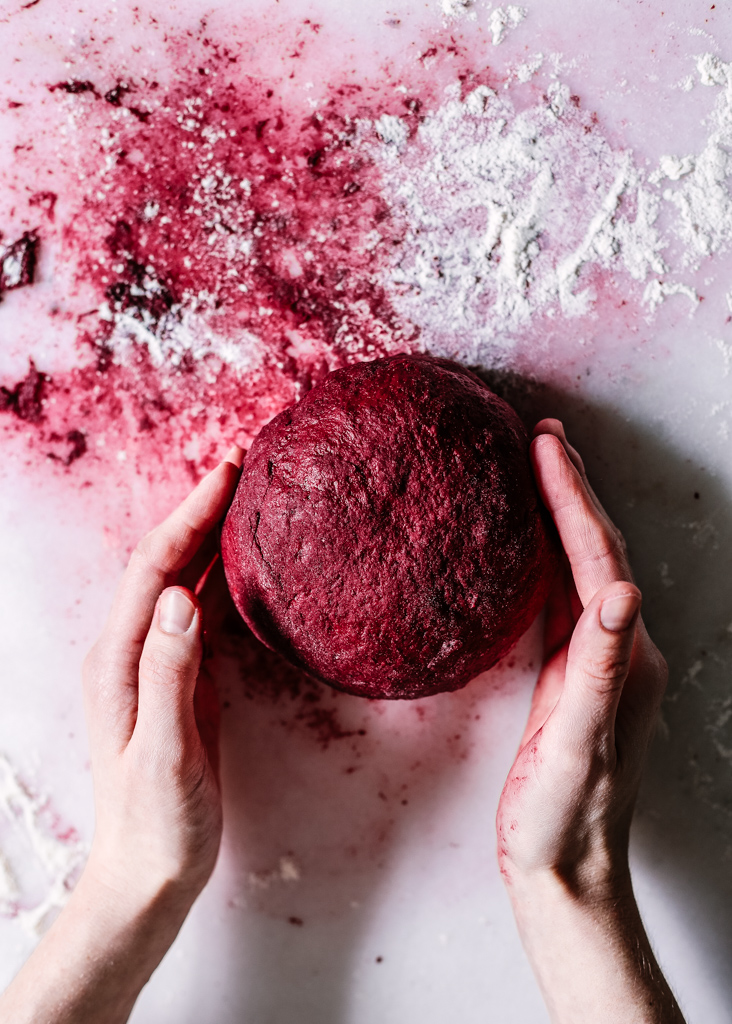
And with Valentine’s Day just around the corner, I wanted to share with you one of my favorite date night recipes for homemade ravioli! And to be extra festive, I’ve tinted the pasta dough with pureed beets for a little pop of red (because #love). However, this step is completely optional and just for looks.


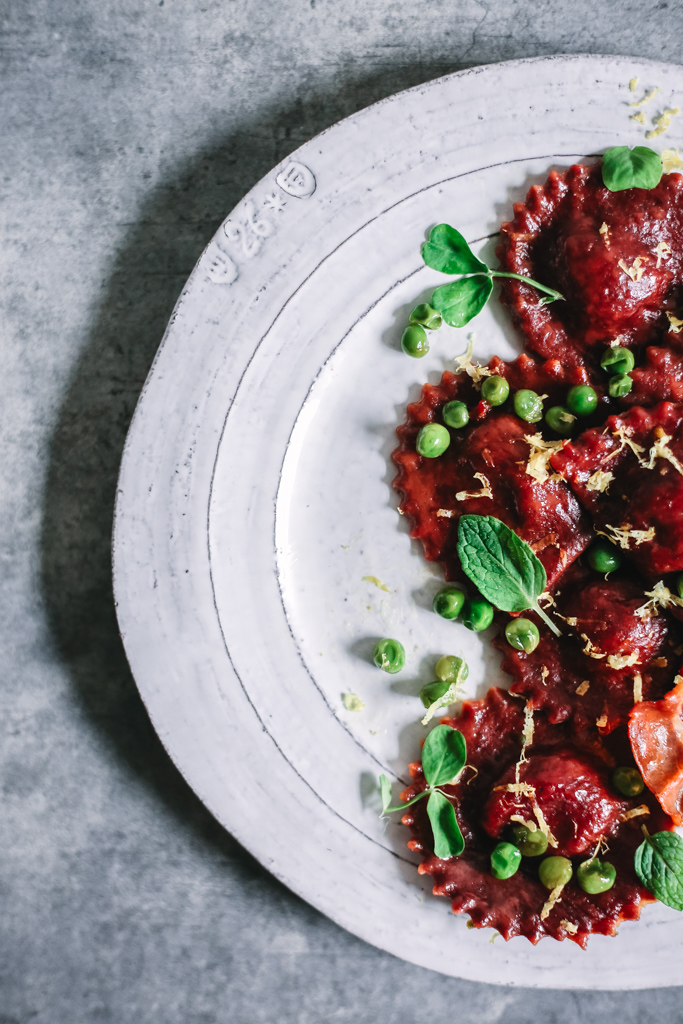
I’m not a fan of heavy, rich, overly-cheesy ravioli recipes that leave you feeling uncomfortably full. Especially when you’re on a date! So I’ve created a filling that’s light, airy and incredibly refreshing made with spring's early flavors of mint, peas and lemon. A bit of ricotta and parmesan give it a lovely whipped structure that's such a pleasant surprise.
The “sauce” is simply melted butter, crisped prosciutto and a handful of peas that get tossed with the ravioli. I like to top the dish with freshly chopped mint, pea shoots and lemon zest to give it added flavor and to make the plate pop as well.
We love to make a meal out of this recipe, serving up larger portions with a side salad or a baguette. But you could certainly serve a smaller portion as a nice first course. Either way, I think you’re really going to love it!
As always, thank you for stopping by and let me know what you think in the comments below!
XX

What You'll Need:
- Pasta Machine to roll out the pasta dough (some say you can use a rolling pin, though I've never tried this!)
- Fluted Pastry Wheel or Ravioli Stamp to cut the raviolis
Ravioli with Mint, Ricotta,
Peas & Lemon
INGREDIENTS:
for the pasta dough:
- 2 cups flour
- 3 eggs
- 1 tsp. salt
- 2 medium beets*
- olive oil *
*optional
for the ravioli filling:
- 1/2 cup ricotta
- 1/2 cup parmesan
- 2 cups frozen peas, thawed
- 1 egg
- 2 cloves garlic
- zest of 1 lemon (reserve a pinch to garnish the pasta dish)
- 1 Tbsp. chopped mint
- salt and pepper to taste
for the pasta dish:
- 1/2 cup peas, thawed
- 3 Tbsp. butter
- 3 ounces, prosciutto
- 1-2 tsp. lemon juice + zest
- chopped mint, to garnish
- parmesan, to garnish
- salt and pepper, to taste
INSTRUCTIONS:
Step 1: Make the Pasta Dough
- for beet pasta dough -
Recipe Note: The Beet Pasta requires an additional 45 minutes to prepare. If you are tight on time, see below for my regular pasta dough recipe!
- Preheat the oven to 375 degrees F. Rinse and dry the beets. Toss with olive oil and wrap tightly with aluminum foil. Place the foil pouch on a sheet pan, and allow the beets to roast for 45 minutes. Once roasted, remove from the oven and allow the beets to cool.
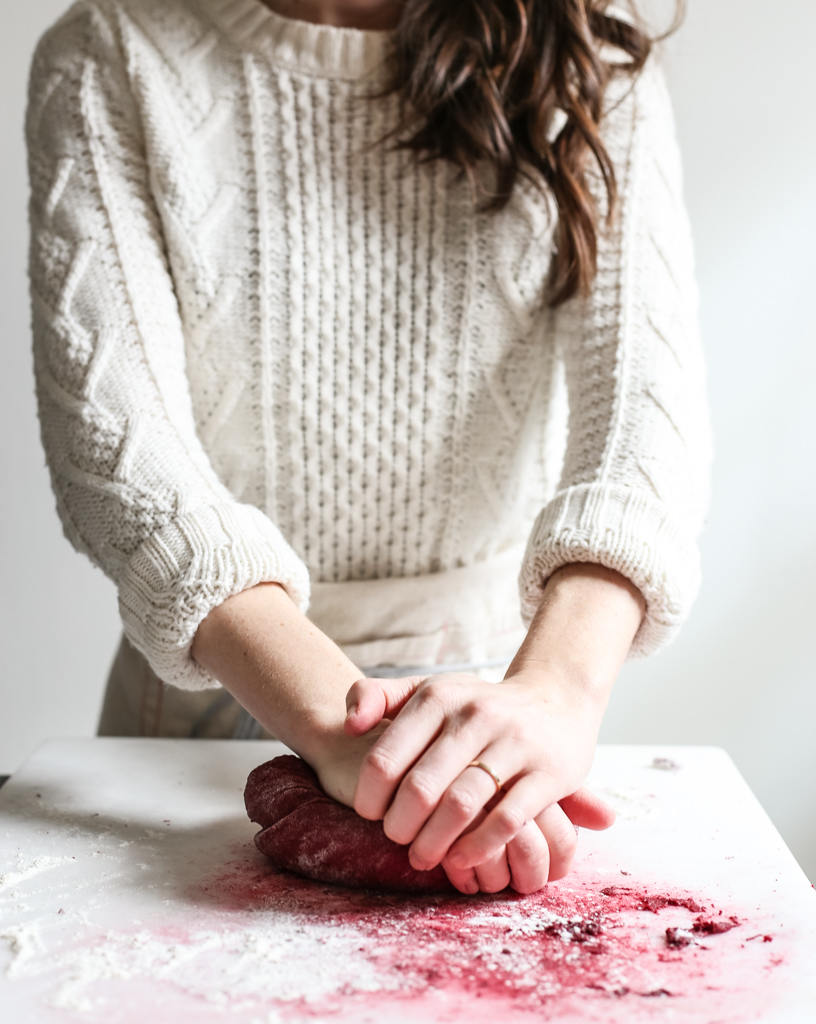
- Once cooled, use paper towels or a vegetable peeler to lightly peel off rough spots of skin. Then, place the beets in a food processor and pulse until pureed. Next, add in the eggs and pulse until blended through. Lastly, add the flour and salt into the food processor and process until a ball of dough begins to form. Flour your hands and your work surface (counter or marble non-stick surface works best), and place the dough onto the surface.
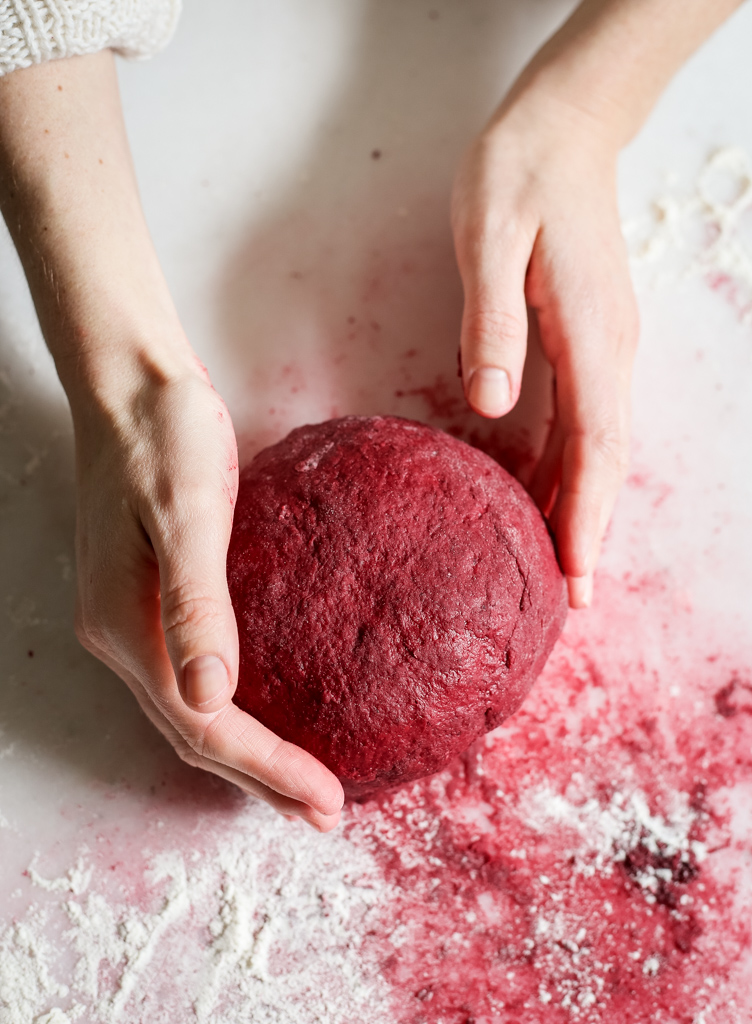
- Knead for about 10-15 minutes (you really can’t over-knead here), or until the dough is completely smooth and has a tacky feel, but not sticky. I like to keep a measuring cup of flour nearby to sprinkle on the dough as I go. If the dough is too wet/sticky, sprinkle a bit of flour on it. This dough will naturally require a bit more flour form the beet puree. You can also use the hook attachment on your kitchen-aid mixer to knead the dough, but I feel I’m less able to judge it’s texture/add flour as needed.
- Once the dough is ready, wrap it tightly in plastic wrap and set aside while you prepare the filling.
- for regular pasta dough -
Place the flour and salt in the bowl of a stand mixer. Whisk together. Make a well and crack in the eggs. Use a fork to begin whisking the eggs and flour together until it forms a shaggy dough. Then, using the hook attachment, knead on low speed for about 7-8 minutes or until the dough is tacky to touch, but not overly sticky. Then wrap the dough in plastic and allow to rest.
Step 2: Make the Filling
In a large bowl or the bowl of your stand mixer, place the ricotta, parmesan, garlic, lemon zest and a pinch each of salt and pepper. Mix until blended together, and taste. You’ll might want to add more salt and pepper, and maybe even more garlic or lemon. The key is to make the filling very flavorful as it will be a bit diluted once wrapped in the dough. Once you’ve got the flavor profile where you want it, then beat in the egg. Lastly, place the filling into a sealable baggie and set in the refrigerator to firm up.
Step 3: Press the Pasta

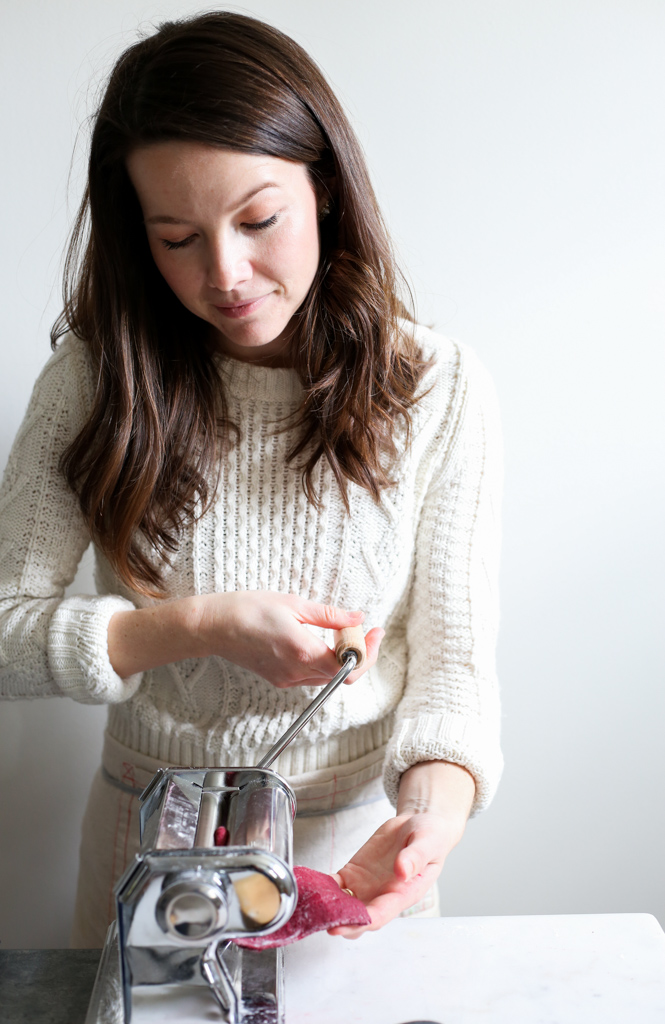
- While your filling is resting in the refrigerator, begin to roll out the pasta. On a floured non-stick surface, cut the ball of dough into 4 to 6 equal portions. Six portions is a good starting point if you’re just getting used to the pasta machine.
- Take one portion of the dough and cover the remaining portions back up with the plastic wrap (Going forward, you’ll want to keep any dough you’re not working with covered at all times as it will quickly dry out). Flatten the portion into a disc using your hands or a rolling pin. You just need it to be thin enough to pass through the widest setting on your pasta machine. Set your pasta machine to 1 (or the widest setting) and crank it through. Then, fold both sides inwards, like a letter, and pass it through the 1st setting two more times.
- TIP: If it gets too long to work with, simply cut the piece in half and continue pressing. Additionally, if it starts feeling sticky, sprinkle it with a light layer of flour (I like to keep a pastry brush nearby with a bit of flour to brush it on evenly)
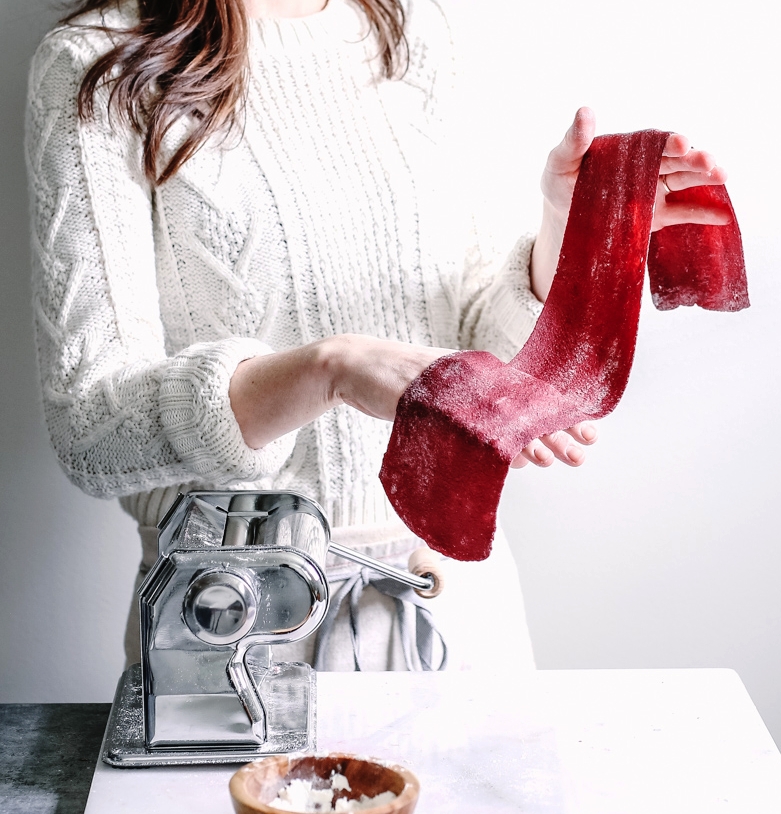
- Next, change the settings on the pasta machine to gradually roll the pasta thinner and thinner. You’ll want to pass the pasta through each setting once or twice before graduating to the next smaller setting. Continue passing it through until you get to setting “5” or “6”. Once finished, the pasta dough should feel fairly delicate, but sturdy.
- Place each strip of pasta dough on a towel-lined baking sheet dusted with flour. Do not lay the pasta on top one another or fold the pasta as it will easily stick. I like to lay 2-3 strips, cover with a towel, then lay 2-3 strips atop another towel and so forth.
Step 4: Make the Ravioli
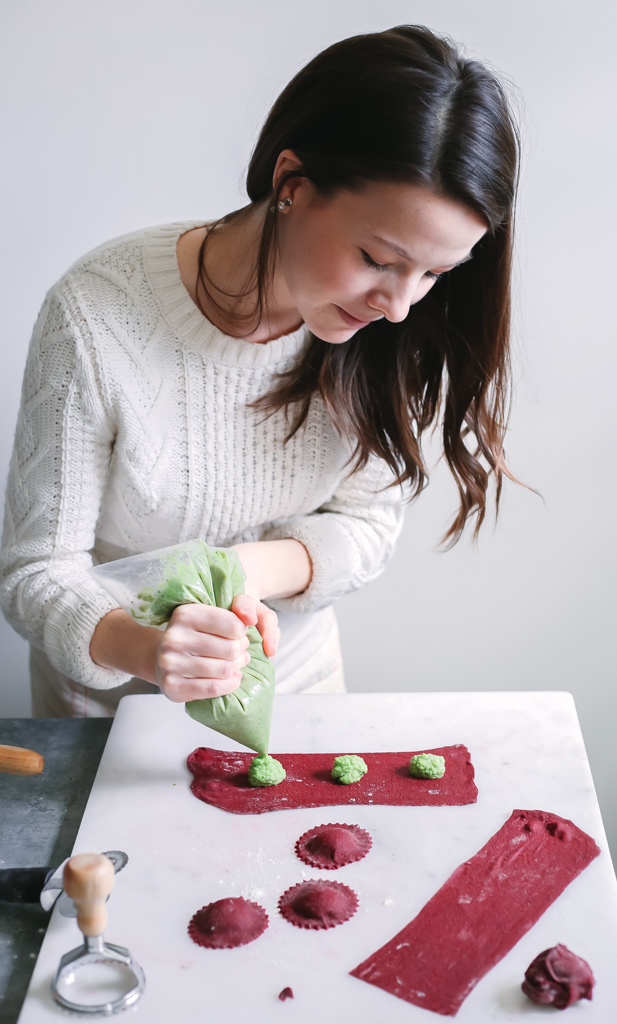


Once all the pasta has been pressed, it’s time to make the ravioli! There are several methods for making ravioli, but I’ll show you my two favorite, using a round ravioli stamp!
Method 1: Full Circle
Pros: Larger, more plump.
Cons: Slower method, can be tricky at first, excess dough trimmings
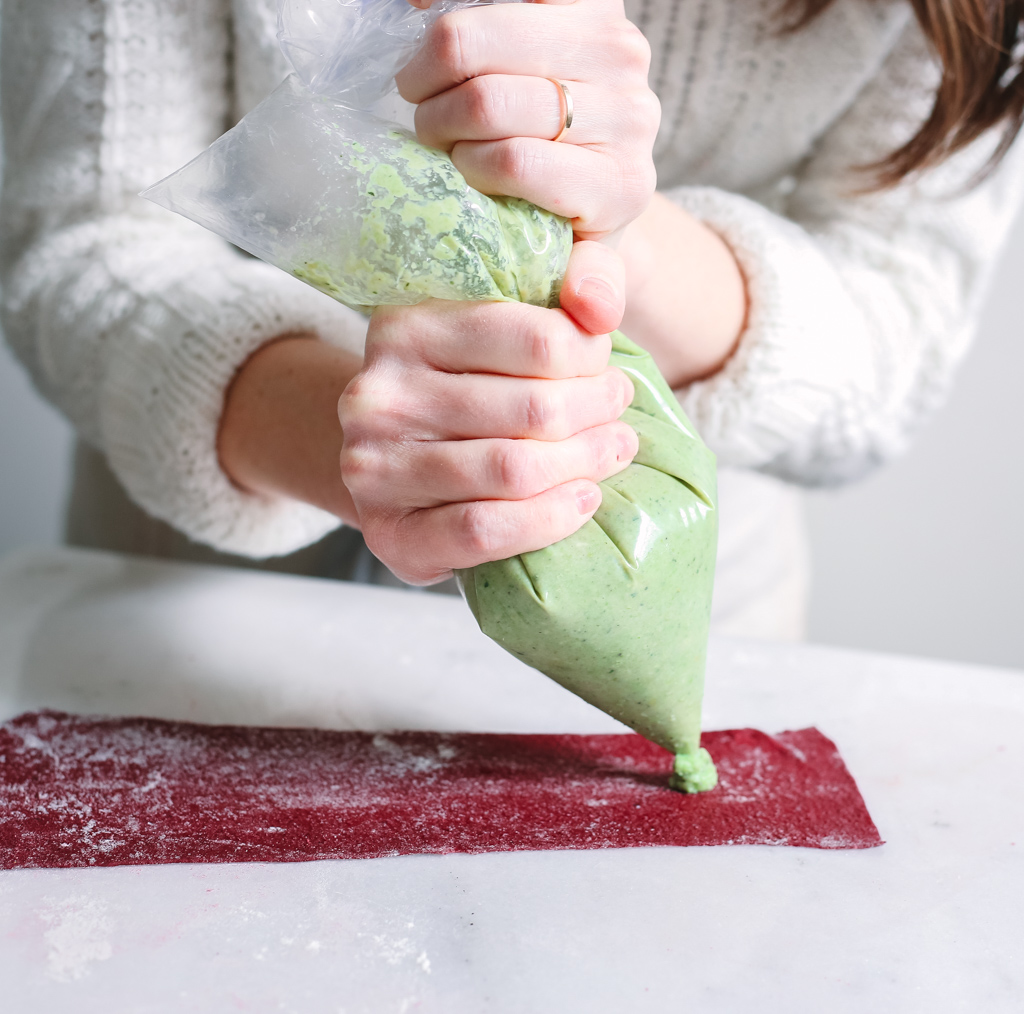
- Take the baggie with filling and cut one of the corners to allow for piping.
- Lay out 1 strip of dough onto a well-floured surface. Starting at one end, pipe about 1 Tbsp. of filling towards the center of the dough. Repeat, leaving at least 1.5 - 2” in between each dollop of filling. Then, align another sheet of dough directly overtop the filling. Use your fingertips to press the air out from around the dough and to seal it together. Then, use your ravioli stamp (or a fluted pastry wheel) to cut out the raviolis. Once cut, place on a well-flour surface and cover.
Method 2: Half Circle
Pros: quick, wastes less dough, sturdy
Cons: yield smaller raviolis
- Take the baggie with filling and cut one of the corners to allow for piping.
- Lay out one strip of dough. Starting at one end and working your way down, pipe 1-2 tsp. filling just a few centimeters below the center of the dough. Then, fold the dough over itself lengthwise, covering the filling. Use your fingers to press out the air and seal the ravioli. Then use your ravioli cutter to cut out a half circle. You will have one sealed end with a fold, and the remainder should be cut out by the stamp.
Once all your ravioli have been made you can either place them in an even layer on a baking sheet and freeze (once fully frozen, you can relocate to a freezer bag), or you can prepare them fresh!
Step 5: Assemble the Pasta
- Bring a large pot of water to a boil.
- Then, place a large skillet over medium heat and begin to melt the butter.
- Place the ravioli in the boiling water and cook for 4 minutes.
- Meanwhile, crisp the prosciutto in the melted butter for about 3 minutes. Then, add in 1/2 cup defrosted peas and toss.
- Once the ravioli are finished cooking. Remove with a slotted spoon and add directly to the skillet. It’s okay if you get a little pasta water in there, it will help with the consistency! Lightly toss the ravioli in the butter mixture and toss with a squeeze of lemon juice, remaining zest, salt and pepper. Lastly, serve with a garnish of chopped mint, pea sprouts and additional lemon as desired.
And ENJOY!